How to Recover Deleted Files in Linux Using TestDisk and PhotoRec Terminal Tools
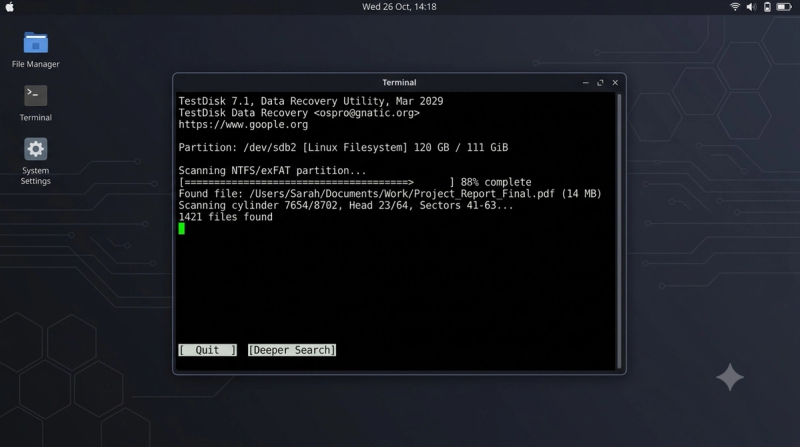
Deleting an important file by mistake can feel like a small disaster. Maybe you emptied the trash too fast, ran a wrong rm command, or formatted the wrong drive. The good news is that deleted files in Linux are often still recoverable, as long as you act quickly.
This guide will show you how to recover deleted files in Linux using TestDisk and PhotoRec, two free and powerful terminal tools. You do not need advanced Linux skills. Just follow each step carefully, and you can get your files back.
By the end of this article, you will understand what causes file loss, how to check if recovery is possible, and how to use TestDisk and PhotoRec safely from the terminal.
Problem Overview
When you delete a file in Linux, the operating system does not immediately erase the data from your storage device. It only removes the file's entry from the file system's index, marking that space as "available" for new data.
This means the actual content of your file often stays on the disk until new data overwrites it. Tools like TestDisk and PhotoRec work by scanning the raw disk for these leftover file signatures and rebuilding them into usable files again.
The recovery process works differently depending on the situation:
- If you deleted a file normally, the file's data blocks may still exist.
- If you formatted a drive, the partition table may be damaged, but file data can remain.
- If you have already written new files to the same disk, recovery becomes harder or impossible.
This is why speed matters. The less you use the affected drive after deletion, the higher your chance of full recovery.
Symptoms
You may need TestDisk or PhotoRec if you notice any of the following:
- A file or folder is missing after deletion, and it is not in the Trash
- A USB drive or SD card shows as empty or unformatted
- A partition disappeared from your file manager
- You accidentally ran
rm -rfon the wrong folder - A drive shows 0 bytes of data after a failed format
- Photos or videos vanished from a memory card
- The file system shows errors like "No such file or directory" for files you know existed
Causes
Understanding why files go missing helps you choose the right recovery method. Common causes include:
- Accidental deletion using
rm,rm -rf, or a file manager's permanent delete option - Accidental formatting of a USB drive, SD card, or partition
- Partition table corruption caused by a sudden power loss or improper drive removal
- Failed operating system installation that wiped an existing partition
- File system corruption from bad sectors or unsafe shutdowns
- Malware or ransomware that deletes or encrypts files
- Human error during disk partitioning with tools like
fdiskorparted
Quick Answer
If you deleted files in Linux, stop using the affected drive immediately. Install TestDisk and PhotoRec, then run PhotoRec to recover individual files, or TestDisk to repair partitions and recover a full folder structure. Always save recovered files to a different drive, never the same one you are recovering from.
What Does This Problem Mean?
TestDisk and PhotoRec are free, open-source data recovery tools created by the same developer. They run in the terminal, which means no fancy graphics, but they are extremely powerful.
- TestDisk is designed to repair partition tables, recover deleted partitions, and fix boot sectors. It also has a file recovery mode.
- PhotoRec is designed to recover individual files, such as documents, photos, videos, and archives, even if the file system is badly damaged.
Both tools work on Linux, Windows, and Mac, but this guide focuses on using them inside a Linux terminal.
Is This Dangerous?
Data recovery itself is safe if done correctly. The real danger comes from continuing to use the affected drive before recovery, since this can permanently overwrite your lost files.
Warning: Never install TestDisk or PhotoRec onto the same drive you are trying to recover files from. Always use a separate drive or USB stick for the tools and for saving recovered files.
Can I Lose Data Permanently?
Yes, if you keep writing new data to the drive after deletion. Every new file, every software installation, and even normal system activity can overwrite the space where your deleted file used to live.
Tip: If the drive is your main system drive, shut down the computer immediately and boot from a Linux live USB instead of continuing to use the installed system.
Before You Start
Before running any recovery command, prepare the following:
- Stop using the affected drive. Do not save, install, or download anything to it.
- Get a second storage device. You need somewhere safe to save recovered files.
- Identify the correct drive name. Use
lsblkorsudo fdisk -lto list all connected drives. - Use a Linux live USB if needed. If your main system drive is affected, boot from a USB instead of your normal desktop.
Note: Administrator (root) permission is required to run TestDisk and PhotoRec, since they need direct access to your storage devices.
Step-by-Step Solutions
Fix 1: Install TestDisk and PhotoRec
What it means
TestDisk and PhotoRec come bundled together in one package. Installing this package gives you both tools.
Why it works
Most Linux distributions do not include these tools by default, so you need to install them from your package manager before you can use them.
How to do it
For Ubuntu, Debian, and Linux Mint:
For Fedora and RHEL-based systems:
For Arch Linux and Manjaro:
Purpose: Installs both TestDisk and PhotoRec on your system. Expected Output: The terminal will download and install the package, ending with a success message. Risk Level: Low. This only adds software; it does not touch your existing files.
[Insert Screenshot: Terminal showing successful TestDisk installation]
If Fix Fails
If installation fails, check your internet connection and run sudo apt update again. On offline systems, you can download the TestDisk package separately from the official CGSecurity website and transfer it using a USB drive.
Fix 2: Identify the Correct Drive
What it means
Before recovering anything, you must know exactly which drive or partition holds your lost files.
Why it works
Running recovery tools on the wrong drive can waste time or, in rare cases, affect the wrong data. Identifying the correct device name prevents this mistake.
How to do it
List all connected drives and partitions:
Or, for more detail:
Look for your drive by its size and label. External drives and USB sticks are often listed as /dev/sdb, /dev/sdc, and so on, while the main system drive is usually /dev/sda.
Purpose: Shows all storage devices and their partition layout. Expected Output: A list of device names, sizes, and mount points. Risk Level: Low. This command only reads information; it changes nothing.
[Insert Screenshot: Terminal output of lsblk command]
Expected Result
You should be able to match the drive size (for example, 32GB for a USB stick) to the correct device name.
If Fix Fails
If you are unsure which device is correct, unplug the drive, run lsblk again, then plug it back in and compare the two lists. The new entry that appears is your target drive.
Fix 3: Recover Files Using PhotoRec
What it means
PhotoRec scans your drive at a low level and rebuilds files based on their data patterns, regardless of file system damage.
Why it works
PhotoRec ignores the file system structure completely. This means it can recover files even when the partition table or folder structure is badly corrupted.
How to do it
- Run PhotoRec with administrator rights:
- Select your target drive (for example,
/dev/sdb) using the arrow keys. - Choose the partition type. In most cases, select [Intel] for standard partitions.
- Choose the file system type:
- ext2/ext3/ext4 for most Linux file systems
- Other for FAT, NTFS, or unknown file systems
- Select the folder where recovered files will be saved. Always choose a different drive.
- Press C to start the scan.
Purpose: Scans the drive and recovers files it detects. Expected Output: A progress bar showing scan status, followed by a summary of recovered files. Risk Level: Low. PhotoRec only reads from the damaged drive; it writes recovered files elsewhere.
[Insert Screenshot: PhotoRec terminal interface showing scan progress]
Expected Result
Recovered files will appear in numbered folders, such as recup_dir.1, recup_dir.2, and so on, inside your chosen save location.
If Fix Fails
If PhotoRec finds no files, try selecting a different file system type or run a deeper scan by choosing the "Whole disk" option instead of a single partition.
Fix 4: Recover Lost Partitions Using TestDisk
What it means
If an entire partition disappeared, TestDisk can find and restore it, often bringing back your original folder structure.
Why it works
TestDisk reads the raw disk sectors to detect old partition boundaries, even after the partition table has been damaged or deleted.
How to do it
- Start TestDisk with root access:
- Select Create to generate a log file for this session.
- Choose your target drive from the list.
- Select the partition table type. TestDisk usually detects this automatically as Intel or EFI GPT.
- Choose Analyse to scan the drive.
- If TestDisk finds a lost partition, it will appear in red or green. Select it and press Enter.
- Choose Write to restore the partition table.
- Restart your computer if prompted.
Purpose: Detects and restores missing or damaged partitions. Expected Output: A list of detected partitions with their size and file system type. Risk Level: Medium. Writing changes to the partition table can affect disk structure, so follow each step carefully.
[Insert Screenshot: TestDisk partition analysis screen]
Expected Result
Your missing partition should reappear in lsblk or your file manager after restarting.
If Fix Fails
If Quick Search does not find your partition, choose Deeper Search instead. This takes longer but checks every sector on the drive.
Advanced Fixes
If the standard steps above do not fully solve your problem, try these advanced options:
- Use TestDisk's file recovery mode: After analyzing your partition, choose the List option to browse and copy individual files without restoring the whole partition.
- Create a disk image first: For badly damaged drives, use
sudo dd if=/dev/sdb of=/path/to/backup.img bs=4M status=progressto create a full backup image, then run TestDisk and PhotoRec on the image instead of the physical drive. - Filter file types in PhotoRec: Before scanning, press F in the file options menu to select only the file types you need, such as
.docx,.jpg, or.mp4. This speeds up the scan and reduces clutter. - Check disk health: Run
- to check for hardware failure, since a failing drive can make recovery unreliable.
Prevention Tips
- Set up automatic backups using tools like
rsync, Deja Dup, or a cloud backup service - Double-check drive names before running
rm,dd, or format commands - Use the Trash feature in your file manager instead of permanent deletion when possible
- Keep at least one backup copy of important files on a separate physical drive
- Avoid ejecting USB drives while files are still being written
- Label your drives clearly to avoid confusing them during terminal commands
Conclusion
Losing files in Linux is stressful, but it is often fixable. TestDisk and PhotoRec give you professional-level recovery tools for free, right from your terminal.
The most important rule is simple: stop using the affected drive immediately, and always save recovered files to a different location. Follow the steps in this guide carefully, and in most cases, you can get your files back without needing expensive software or a data recovery service.
If your drive shows signs of physical damage, such as unusual noises or repeated disconnections, back up what you can and consult a professional data recovery service instead of continuing to run tools on a failing drive.
Frequently Asked Questions
What is TestDisk used for?
TestDisk is used to repair partition tables, recover deleted partitions, and fix boot sectors on a storage drive.
What is PhotoRec used for?
PhotoRec is used to recover individual files, such as photos, documents, and videos, by scanning a drive for file signatures.
Can I recover files after formatting a drive?
Yes, in many cases. Formatting removes the file system's index, but the actual file data often remains until new data overwrites it.
Is it safe to run these tools on my main system drive?
It is safer to boot from a Linux live USB and run TestDisk or PhotoRec from there, especially if your main system drive is the one with missing files.
Why did PhotoRec recover files with random names?
PhotoRec rebuilds files based on data patterns, not file system records, so original file names and folder structures are often lost. The file content itself is usually intact.