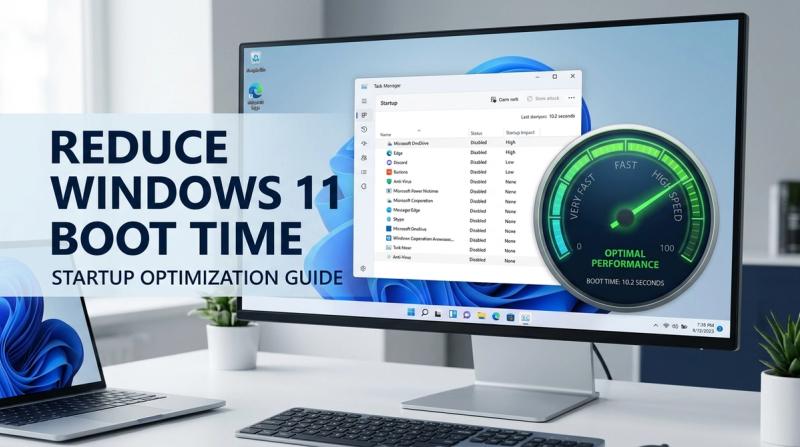
Reduce Windows 11 Boot Time: Startup Optimization Guid
If your Windows 11 computer takes a long time to reach the desktop, sits on a spinning loading circle, or feels unresponsive for the first minute after sign-in, you are not imagining it. Slow startup is one of the most common Windows 11 complaints, and it almost always comes down to a small number of fixable causes: too many startup programs, an aging hard drive, outdated drivers, or a system that has simply collected years of clutter.
This guide walks through every practical fix for slow Windows 11 startup, in the order you should try them. For each one, you'll learn why the cause slows down your boot, exactly how to fix it using tools already built into Windows, what result to expect, and what to do if it doesn't help. No extra software is required for most of these steps, and you don't need a video to follow along.
Quick Answer: How to Fix Slow Windows 11 Startup
In most cases, slow Windows 11 startup is caused by too many apps launching automatically when you sign in. Open Task Manager (Ctrl+Shift+Esc), click the Startup apps tab, and disable anything rated "High" startup impact that you don't need running the moment you log in.
If that doesn't fully fix it, the next biggest factor is your storage drive. A traditional hard disk drive (HDD) is the most common cause of slow boots on PCs more than a few years old. Upgrading to a solid-state drive (SSD) typically cuts boot time from over a minute down to 15-20 seconds.
What Is Slow Windows 11 Startup?
"Slow startup" means the time between turning on your PC and having a desktop you can actually use is noticeably longer than it should be. As a rough guide:
- A healthy SSD-based Windows 11 PC reaches a fully usable desktop in 10-20 seconds.
- A PC running on an HDD typically takes 40-90 seconds.
- Anything over 2 minutes, or a desktop that appears but stays laggy and unresponsive for 30+ seconds afterward, counts as a startup problem worth fixing.
Boot time should be measured from power-on to a fully responsive desktop, not just to the lock screen. Many PCs reach the login screen quickly but then stall for another 30-60 seconds while background apps load. That stall is what most people actually mean when they say their PC is "slow to start," and it's the part this guide focuses on fixing.
Why Does Windows 11 Boot Slowly?
Startup speed depends on three things working together: how much software tries to load automatically, how fast your drive can read that software, and whether the operating system itself is running cleanly. When boot time slows down, it's almost always one or more of these causes:
Too many startup programs. Every app that adds itself to startup competes for CPU, memory, and disk access in the first minute after sign-in. Five apps loading at once is fine; twenty is not.
An HDD instead of an SSD. A mechanical hard drive can take 5-10 times longer than an SSD to read the thousands of small files Windows needs during boot. On PCs older than 3-4 years, this is usually the single biggest factor.
Not enough RAM. With only 4GB or 8GB of RAM, Windows has to fall back on slower virtual memory once several startup apps load at once, which adds noticeable delay.
Outdated or corrupted drivers. Storage, chipset, and network drivers run very early in the boot process. An outdated one can make Windows wait several extra seconds for a device to respond.
Pending Windows updates. Updates that finish installing during shutdown or the next startup will visibly extend boot time until they complete.
Malware or unwanted background processes. Malicious or poorly written software can run hidden processes from the moment Windows starts, using up resources before you even reach the desktop.
A nearly full storage drive. Once free space drops below roughly 10-15% of total capacity, Windows struggles to manage temporary files and virtual memory efficiently, slowing both boot and general performance.
Outdated BIOS/UEFI firmware or boot settings. Some firmware settings, like checking for a network or optical drive at every boot, add delay before Windows even starts loading.
Symptoms That Tell You Your Startup Needs Attention
You likely have a startup-specific problem if you notice any of the following:
- The Windows 11 logo or loading dots stay on screen for an unusually long time.
- The login screen appears quickly, but the desktop stays laggy or unresponsive for 30 seconds to several minutes afterward.
- Several app windows pop open automatically every single time you sign in.
- Disk usage in Task Manager sits at 90-100% right after boot, even though you haven't opened anything yet.
- The mouse or taskbar doesn't respond properly for a while right after login.
- The PC feels fine once it's been running for a few minutes — the slowness is specific to startup.
If these match your experience, and performance is normal once everything has loaded, the fixes below will help. If your PC is slow all the time, even hours after boot, the cause may be different — check Task Manager's Performance tab during normal use as well, since that points to a separate RAM, CPU, or drive-health issue.
How Windows 11 Boots: A Quick Look Behind the Scenes
Knowing how startup actually works makes it clear why each fix below helps. Four stages happen, in order, every time you turn on the PC:
- Power-on and firmware (BIOS/UEFI). The motherboard checks hardware, then hands control to the boot loader. This normally takes 1-5 seconds on modern hardware unless firmware settings are slowing it down.
- Windows Boot Manager and kernel load. Windows loads its core system files from your drive. This is where drive speed — HDD versus SSD — makes the biggest difference, since hundreds of files are read during this stage.
- Sign-in and session start. After you enter your PIN or password, Windows loads your user profile, desktop, and the apps registered to launch at sign-in.
- Startup app and service loading. This is the stage most people experience as "the slow part." Every app in your Startup list, plus background services like cloud sync, antivirus, and Windows Update, compete for CPU and disk access at the same time.
Fast Startup changes stages 1-2 by saving a snapshot of the kernel to speed up the next boot. Disabling startup apps targets stage 4 directly. An SSD upgrade speeds up stages 2 and 4 together, which is why it usually produces the single biggest improvement of any fix.
How to Fix Slow Windows 11 Startup (Step-by-Step)
Work through these in order. Most people solve their startup problem within the first three or four fixes, before ever reaching a hardware upgrade.
Fix 1: Check Which Apps Are Slowing Down Your Startup
Why this helps: Before disabling anything, you need to see what's actually causing the delay — and Windows already tracks this for you.
How to do it:
- Press Ctrl + Shift + Esc to open Task Manager.
- Click the Startup apps tab on the left (click "More details" first if you only see a simplified window).
- Look at the Startup impact column — apps are rated Not measured, Low, Medium, or High.
- Click that column header to sort, so the highest-impact apps are grouped together.
Expected result: A clear list of exactly which apps are adding the most delay, instead of guessing.
If it doesn't work: If every app shows "Not measured," restart your PC once. Windows needs at least one full boot cycle after a change before it can measure impact again.
Fix 2: Disable Unnecessary Startup Apps
Why this helps: Each high-impact app you disable removes one competitor for CPU, RAM, and disk access during the first minute after sign-in. For most people, this is the single most effective free fix.
How to do it:
- In the Startup apps tab from Fix 1, right-click any app rated High or Medium that you don't need running the instant you log in.
- Select Disable.
- Repeat for chat apps, update checkers, manufacturer utilities, and game launchers you don't use daily.
- Leave antivirus software, Windows Security, audio drivers (e.g. Realtek), graphics drivers, and touchpad/keyboard utilities enabled — these are part of normal system operation, not bloatware.
- Restart your PC to feel the difference.
Expected result: Disabling 5-10 unnecessary apps typically saves 15-40 seconds off total boot time.
If it doesn't work: Disabling here only stops the app from auto-launching — it does not uninstall it. If you're unsure what an app does, search its exact name before disabling it, since some background helpers (fingerprint readers, VPN clients) are easy to mistake for bloatware.
Fix 3: Stop Apps From Reopening After Sign-In
Why this helps: Windows 11 can automatically reopen apps that were running when you last shut down or restarted, which makes startup feel slower even after you've already disabled the usual startup apps.
How to do it:
- Open Settings (Windows key + I).
- Go to Accounts > Sign-in options.
- Scroll down and turn off "Automatically save my restartable apps and restart them when I sign back in."
Expected result: Apps that were open before shutdown no longer relaunch automatically, giving you a clean desktop at startup.
If it doesn't work: This setting only affects apps that support session restore. Apps added through the Startup folder or Task Manager's Startup tab need to be disabled separately using Fix 2.
Fix 4: Enable Fast Startup
Why this helps: Fast Startup saves a snapshot of the Windows kernel and loaded drivers to your drive when you shut down, similar to a partial hibernation. The next time you turn the PC on, Windows reloads that snapshot instead of starting every system process from scratch.
How to do it:
- Open Control Panel (search for it from the Start menu).
- Go to Hardware and Sound > Power Options (or System and Security > Power Options, depending on your view setting).
- Click "Choose what the power buttons do" in the left sidebar.
- Click "Change settings that are currently unavailable" (this requires an administrator account).
- Under Shutdown settings, check "Turn on fast startup (recommended)."
- Click Save changes.
Expected result: Shutdown and the following boot should feel noticeably faster, often by several seconds up to over a minute on older hardware.
If it doesn't work: If the checkbox is missing, hibernation is likely disabled. Open Command Prompt as administrator and run powercfg /hibernate on, then check Power Options again. Do not enable Fast Startup if you dual-boot Windows with Linux or another OS — it can lock the Windows partition in a way the other OS can't safely access.
Fix 5: Remove Bloatware and Apps You Never Use
Why this helps: Pre-installed manufacturer apps, trial software, and forgotten old programs often register background services or scheduled tasks that run even when they're not in your Startup list.
How to do it:
- Open Settings > Apps > Installed apps.
- Sort by size, or scroll through the full list.
- Click the three-dot menu next to anything you don't recognize or use — manufacturer "experience" apps, trial antivirus software, old game launchers — and select Uninstall.
- Restart your PC after removing 3-5 apps at a time.
Expected result: Fewer background services competing for resources at boot, plus more free disk space (see Fix 8).
If it doesn't work: If you're unsure whether an app is safe to remove, search its exact name first. Avoid removing anything tied to your motherboard, graphics card, or laptop manufacturer's driver management software — some of these control real hardware features despite looking like bloatware.
Fix 6: Update Your Drivers
Why this helps: Storage controller, chipset, and network drivers load very early in the boot process. An outdated one can make Windows wait longer than necessary for a device to respond.
How to do it:
- Press Windows key + X and select Device Manager.
- Expand Disk drives, Display adapters, and Network adapters, one at a time.
- Right-click each device, select "Update driver," then "Search automatically for drivers."
- Also check Settings > Windows Update > Advanced options > Optional updates for available driver updates.
- Restart after installing any update.
Expected result: Boot-stage devices initialize faster, and you may notice fewer random freezes after startup too.
If it doesn't work: If Device Manager shows nothing new, check your laptop or motherboard manufacturer's support page directly — some drivers, especially storage controllers, aren't always distributed through Windows Update.
Fix 7: Scan for Malware
Why this helps: Malware and unwanted background processes can load before the desktop even appears, adding delay while also creating a real security risk. Slow startup is one of the most common early warning signs of an infection.
How to do it:
- Open Settings > Privacy & security > Windows Security.
- Click Virus & threat protection.
- Click Scan options, choose Full scan, then click Scan now.
- Let it finish — this can take 20-60 minutes depending on how much is stored on your drive.
- Quarantine or remove anything flagged.
Expected result: Any malicious startup processes are removed, and boot time should return to normal once they're gone.
If it doesn't work: If Windows Security finds nothing but you still suspect malware (browser redirects, unfamiliar processes in Task Manager, random pop-ups), run a second scan with a reputable on-demand scanner such as Malwarebytes as a second opinion. Avoid "PC speed-up" tools advertised through pop-ups — they're a common way malware gets installed in the first place.
Fix 8: Clean Up Disk Space and Temporary Files
Why this helps: When your drive is more than 85-90% full, Windows has less room to manage virtual memory and temporary files efficiently, which slows down both boot and overall performance.
How to do it:
- Open Settings > System > Storage.
- Turn on Storage Sense and set it to run automatically (e.g. monthly).
- Click "Cleanup recommendations" and remove temporary files, Recycle Bin contents, and any unused apps it suggests.
- Alternatively, search for "Disk Cleanup" in the Start menu, select your system drive, and check Temporary files, Recycle Bin, and Windows Update Cleanup before clicking OK.
Expected result: Freeing even 10-20GB can noticeably improve boot and general responsiveness if your drive was nearly full.
If it doesn't work: If you're still low on space right after cleaning, the real fix may be a higher-capacity SSD rather than repeated manual cleanup — especially if the drive fills back up within weeks.
Fix 9: Defragment Your Hard Drive (HDD Only)
Why this helps: On a traditional HDD, files get split into fragments scattered across the disk over time, and the read head has to move physically to collect them. This step does not apply to SSDs and should never be run on one.
How to do it:
- Search for "Defragment and Optimize Drives" in the Start menu.
- Select your system drive (usually C:).
- Check the Media type column to confirm it says "Hard disk drive." If it says "Solid state drive," skip this fix entirely.
- Click Optimize and let it finish — this can take 20 minutes to a few hours on a large, heavily fragmented drive.
Expected result: File access during boot becomes faster as files are reorganized into more continuous blocks.
If it doesn't work: If defragmenting gives little improvement, the HDD itself is likely the real bottleneck, and an SSD upgrade (Fix 10) will deliver a far bigger result than further HDD maintenance.
Fix 10: Upgrade From HDD to SSD
Why this helps: This is the single biggest performance upgrade available for an older PC. An HDD reads data mechanically using a spinning platter and a moving head, typically managing 80-160MB/s. A SATA SSD reads data electronically at 400-550MB/s, and an NVMe SSD can exceed 2,000MB/s. Since Windows reads thousands of small files during boot, this gap alone often cuts boot time from 60-90 seconds down to 15-20 seconds.
How to do it:
- Check whether your PC has a free M.2 slot (faster NVMe SSD) or only a SATA bay (standard SATA SSD) — your motherboard or laptop manual will confirm this.
- Back up your important files before doing anything else.
- Use a cloning tool, often provided free by SSD manufacturers (e.g. Samsung Data Migration, Crucial/Acronis, or Macrium Reflect), to clone your existing Windows installation onto the new SSD.
- Physically install the SSD, then set it as the primary boot drive in BIOS/UEFI.
- Alternatively, do a clean installation of Windows 11 directly on the new SSD if you'd rather start fresh.
Expected result: A dramatic drop in boot time — usually the single most noticeable change you can make to an older PC.
If it doesn't work: If boot time doesn't improve afterward, confirm in BIOS that the SSD (not the old HDD) is set as the first boot device, and confirm in Device Manager that the drive is running in AHCI mode, not IDE/legacy mode.
Fix 11: Add More RAM (If You're Low)
Why this helps: With only 4GB or 8GB of RAM, Windows 11 and your startup apps may not all fit in physical memory at once, forcing the system onto the page file — a slower, drive-based overflow memory — during boot.
How to do it:
- Open Task Manager > Performance tab > Memory to check your current RAM amount and usage.
- If usage sits above 80% shortly after boot with little else open, more RAM will likely help.
- Check your PC's supported RAM type and maximum capacity (search your exact model online, or check the Memory tab, which shows slots used).
- Buy matching RAM modules and install them, or have a technician do it if you're not comfortable opening the case.
Expected result: 8GB is the realistic minimum for smooth Windows 11 performance in 2026; 16GB is worth considering if you multitask heavily or keep many browser tabs open.
If it doesn't work: More RAM won't fix a slowdown actually caused by a slow HDD or too many startup apps. Try Fixes 1-2 and Fix 10 first, and only add RAM if Task Manager specifically shows high memory usage.
Fix 12: Update BIOS/UEFI and Check Boot Settings
Why this helps: Outdated firmware can include slower boot routines, and certain settings — like checking for a network or optical drive boot device every time — add unnecessary delay before Windows even starts loading.
How to do it:
- Check your current BIOS version: Settings > System > About, or run
msinfo32and look for "BIOS Version/Date." - Visit your motherboard or laptop manufacturer's support page and compare it to the latest available version.
- If an update is available, follow the manufacturer's exact instructions, since BIOS updates carry real risk if interrupted.
- While in BIOS/UEFI (usually accessed by pressing F2, F10, F12, or Del at the very start of boot), disable boot checks for drives you don't use, such as network or optical drive boot, and confirm Fast Boot is enabled if your firmware offers it.
Expected result: A few seconds saved before Windows even begins loading, plus better hardware compatibility from the firmware update itself.
If it doesn't work: Only attempt a BIOS update if you're comfortable following the manufacturer's steps exactly. Never interrupt a BIOS update — don't turn off or unplug the PC — since this can leave the motherboard unable to boot at all.
Fix 13: Run a Clean Boot to Find a Hidden Conflict
Why this helps: If you've tried every fix above and startup is still slow, a background service that never appeared in the Startup apps list may be the cause. A clean boot starts Windows with only essential Microsoft services and no third-party startup programs, helping you isolate the problem.
How to do it:
- Press Windows key + R, type
msconfig, and press Enter. - Go to the Services tab, check "Hide all Microsoft services," then click "Disable all."
- Go to the Startup tab, click "Open Task Manager," and disable any remaining items there.
- Click OK and restart your PC.
- If startup is now fast, re-enable services one at a time (unchecking "Hide all Microsoft services" again if needed) until the slowdown returns — that tells you exactly which service is responsible.
Expected result: You identify the exact service or third-party software causing the slowdown, even if it never showed up in the normal Startup apps list.
If it doesn't work: Remember to reverse this afterward. A clean boot is a diagnostic state, not a permanent setup — leaving services disabled long-term can affect antivirus updates, cloud sync, and printing.
Is It Safe to Change These Startup Settings?
Yes, every fix in this guide is safe when done as described, with two cautions. Only disable startup items you recognize or have researched — avoid disabling antivirus software, Windows Security, or core hardware drivers (audio, graphics, storage, touchpad), since these aren't bloatware and disabling them can cause instability instead of speed gains. Also, don't enable Fast Startup on a PC that dual-boots with Linux or another operating system, since it can leave the Windows drive in a state the other OS can't safely read. Hardware changes like SSD upgrades and adding RAM are safe as long as you back up your data first and handle components carefully, ideally with the PC unplugged.
How Long Does It Take to Fix Slow Startup?
Most software fixes (Fixes 1-9) take 5-15 minutes each to apply, plus one restart to test the result — you can realistically work through all of them in under an hour. A full malware scan (Fix 7) can run in the background for 20-60 minutes while you continue with other steps. Hardware changes take longer: an SSD upgrade typically takes 1-3 hours including cloning your existing Windows installation, while adding RAM is usually a 15-30 minute physical task. If you only have time for one fix today, start with Fix 2 — disabling startup apps requires no purchase and produces a noticeable result for most users within minutes.
How to Verify Your Boot Time Actually Improved
It's easy to assume a fix worked just because the PC feels faster. Confirming with an actual number gives you a real before-and-after comparison.
To check your exact boot time:
- Open Event Viewer (search for it from the Start menu).
- Go to Windows Logs > System.
- Press Ctrl+F and search for "Event ID 100," logged by the Diagnostics-Performance source.
- Open one of these events — the description shows your exact boot duration in milliseconds for that startup.
Alternatively, just time it with a phone stopwatch from the moment you press the power button to the moment the desktop is fully responsive, not just visible, and compare that number before and after each fix. Run the test 2-3 times, since the very first boot after a Windows update or BIOS change is often slower than normal.
When a Hardware Upgrade Is the Real Answer
Software fixes can only do so much if the hardware itself is the bottleneck. Consider a hardware upgrade if you're still running a mechanical HDD as your main drive regardless of how many startup apps you disable, if you have 4GB of RAM and regularly see Memory usage above 80-90% in Task Manager, or if your PC is more than 5-6 years old and was a budget or mid-range model when new. In these cases, an SSD upgrade (Fix 10) typically delivers more improvement than every software fix in this guide combined, and it's often cheaper than buying a new PC if the rest of your hardware is still reasonably capable.
Common Mistakes to Avoid
Don't disable Windows Security, antivirus software, or hardware drivers thinking they're bloatware — this can cause crashes or leave your PC unprotected instead of making it faster. Don't run registry cleaners or unverified "PC speed-up" tools, since many are either ineffective or contain malware themselves; everything in this guide uses tools already built into Windows 11. Don't defragment an SSD — it provides no benefit and slightly shortens its lifespan through unnecessary write cycles. Don't judge a fix by a single restart; test 2-3 times, since background Windows Update activity can make any one boot look slower than normal. And don't skip the backup step before an SSD upgrade or major driver update, since both carry a small risk of data loss if something goes wrong mid-process.
Related Solution Hub Guides
Frequently Asked Questions
Why is Windows 11 taking so long to boot?
he most common reason is too many apps launching automatically at sign-in, followed by running on an HDD instead of an SSD. Check Task Manager's Startup apps tab first — it usually points straight to the cause.
How do I check startup programs?
Press Ctrl+Shift+Esc to open Task Manager, then click the Startup apps tab. The Startup impact column shows which apps are slowing down your boot the most.
Does an SSD improve boot speed?
Yes, significantly. SSDs read data several times faster than HDDs, and since Windows reads thousands of small files during boot, this usually cuts boot time from 60-90 seconds to 15-20 seconds.
Is Fast Startup safe to enable?
Yes, for most users. Avoid it only if you dual-boot Windows with Linux or another operating system, since it can prevent that OS from safely accessing the Windows drive.
Why is Windows 11 taking so long to boot?
The most common reason is too many apps launching automatically at sign-in, followed by running on an HDD instead of an SSD. Check Task Manager's Startup apps tab first — it usually points straight to the cause.
How do I check startup programs?
Press Ctrl+Shift+Esc to open Task Manager, then click the Startup apps tab. The Startup impact column shows which apps are slowing down your boot the most.
Does an SSD improve boot speed?
Yes, significantly. SSDs read data several times faster than HDDs, and since Windows reads thousands of small files during boot, this usually cuts boot time from 60-90 seconds to 15-20 seconds.
Is Fast Startup safe to enable?
Yes, for most users. Avoid it only if you dual-boot Windows with Linux or another operating system, since it can prevent that OS from safely accessing the Windows drive.
How much RAM is needed for smooth Windows 11 performance?
8GB is the realistic minimum in 2026. 16GB is recommended if you multitask heavily, keep many browser tabs open, or run resource-intensive apps.
Can a Windows Update cause slow startup?
es, temporarily. Updates that finish installing during shutdown or the next boot will visibly extend that one startup. If slow boots continue for days afterward, the cause is likely unrelated and worth checking with the other fixes in this guide.